Once IT professionals identify a VMware alternative, the next phase is to develop a step-by-step VMware exit strategy. We talk with VMware customers multiple times a day, and they want to take advantage of VergeOS’ performance, ransomware resiliency, and, of course, 70%+ cost savings, but the next question is always, “Where do I start?”
The good news is there are a lot of ways to start your journey to VergeOS:
- Put new workloads on VergeOS
- Use VergeOS for remote offices or Edge locations
- SAN Replacement
- HCI Replacement
A Methodical Risk-Free VMware Exit
In this article, we will take you through the process of converting from VMware to VergeOS, even if none of the above use cases apply right now. Instead, we will assume your primary motivation is:
- Lowering VMware costs
- Extending the life of existing hardware
- Improving ransomware resiliency
We will also respect that VMware is infrastructure, and unwinding it from your data center is a process. You’ll also notice that each of these steps provides cost savings along the way as you head to the eventual goal of replacing VMware for the ultimate cost reduction.
VMware Exit Step 1 – Use VergeOS for Backup/DR
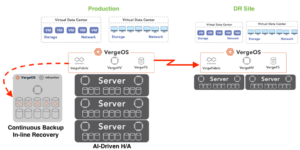
Creating a step-by-step VMware exit strategy starts with making sure you have good backups. What if you could not just have a backup but also improve your recoverability? VergeOS’ migration capability leverages the VMware backup API and can back up your virtual machines (VM) regularly to a relatively basic VergeOS instance. We use Change Block Tracking (CBT) to keep the VMs up to date while using minimal network bandwidth. Starting with Backup/DR provides a very affordable extra layer of protection for your VMware environment.

You don’t have to turn off what you are currently using for data protection and disaster recovery (DR). Still, many customers find this method a more viable recovery mechanism since all the components for a complete recovery are now converged into a few servers. If a server in your VMware cluster or if your storage array fails, you can, within minutes, have the impacted VMs running in the VergeOS instance.
The hardware requirements for this insurance DR are minimal. You need two or three servers and some internal storage for those servers with enough capacity to protect your virtual machines. In most cases, customers, because of VergeOS’ efficiency, can use servers that they already have on hand, further reducing costs. You’ll need a small flash tier for VergeOS, and then you can send backups to either flash or hard disk drives.
Make All-Flash DR Affordable
Ideally, you want your DR target to be as fast as production because that DR target might someday be production! In the era of all-flash, that means a flash-based DR solution, which makes production-class recovery very expensive.
Because VergeOS uses internal server storage and built-in data deduplication, you can now afford to use flash-based drives, even for backup and DR. For example, 15.3TB NVMe SSDs are less than $1,500 off the shelf. Insert a set of these into your servers, and you have hundreds of terabytes of high-performance flash capacity.
Remember VergeOS charges by the physical server; there is no additional charge for the type of drive technology used or capacity required. The advantage is not just faster backups; in the event of a disaster, your VMs can instantiate on the VergeOS instance at better-than-production performance. VergeOS also supports hard disk drives (HDD), so older backups or less critical VMs can be directed there.
Our DR functionality, IOprotect, is built into VergeOS at no additional charge. The advantage of using VergeOS for backup and DR as a first step is that your investment in the software can start paying dividends within days of purchase.
VMware Exit Step 2 – NAS Replacement

Part of a step-by-step VMware exit strategy might be using VergeOS as a Network Attached Storage (NAS) replacement for file services. You can add more capacity to the existing servers you are using in step one, or you can add one or two more. Again, the drives you add can be flash or HDD, depending on the data you will serve through our file services. Once again, everything is deduplicated, so capacity utilization is very efficient. File data is the most susceptible to ransomware, and moving it to VergeOS means that all of this data benefits from our IOfortify solution. Ransomware is an infrastructure problem.
NAS vendors charge a premium for their solutions, and if you primarily use those systems for file services, you are paying too much. Eliminating an existing NAS or at least not paying a premium to add capacity can dramatically reduce expenditures.
VMware Exit Step 3 – Testing
Again, VMware and VergeOS are infrastructure software. You will want to test your workloads to ensure they work perfectly within VergeOS. You should find no issues; in many cases, you’ll see a performance improvement, but testing is an expected requirement.
The good news is that if you follow step one, you are ready to start step three. Go to your backed-up VMs and import the first set of VMs that you want to test. You do not have to import everything at once, so start as small as you are comfortable. All the VMs, including the VMware versions of the VMs you are converting to VergeOS, will continue to be backed up by VergeOS. Within moments, the selected VMs will be available within the VM console; start them up and begin your testing. You can test them for a long time to ensure you’ve covered all the bases.
VMware Exit Step 4 – Conversion
The next step in a step-by-step VMware exit strategy is conversion. Again, you don’t need to convert all the VMs at once. Some customers will convert low-priority workloads first, then wait for a compelling event to convert the rest. Meanwhile, those VMware VMs continue to be protected by VergeOS.

The compelling event may be one of the use cases mentioned earlier. New workloads are an obvious item to initiate on VergeOS instead of VMware. Remote offices and Edge locations are also a great place to start. If there is infrastructure (servers, network switches, internal storage) at the remote location, VergeOS can leverage it. These smaller locations can convert quickly, and customers can enjoy the benefits immediately.
Another compelling event may be a resource issue. You may have workloads that need more processing power, access to GPUs (we virtualize those), or the most common resource shortage, storage capacity. Implementing more resources within VergeOS is always less expensive than building your current infrastructure. We provided a real-world example of this in our blog “Exiting VMware to Eliminate High Storage Costs.”
The Final Step – VMware Elimination
The final and most compelling event is when your VMware license comes up for renewal. With other solutions, this could be a scary all-or-nothing proposition. With VergeOS and following the above steps, you are not throwing a switch and saying a prayer. The migration is completely de-risked, and when you get that jaw-dropping renewal notice from VMware, you probably already have most of your environment running on VergeOS. All that is left to do is cancel the contract and figure out what to do with the extra money you now have in your IT budget.
See It For Yourself
We go through these steps and show a complete VMware migration demonstration in our on-demand webinar to learn more about our risk-free VMware Exit strategy and see a VMware Migration in action.
Or schedule a 25-minute technical whiteboard session, and we will sketch the whole process out for you.


